Pages

Thursday, December 21, 2017

Mix it Up!

Hello out there! This is Courtney Lee from Court's Crafts here with my final cards on the Doodlebug team. I decided to step down this coming year. With three small children at home I want to be enjoying them more and I think I am getting into quilting! My heart is heavy leaving Doodlebug. They are truly the best company to "work" for as it always feels like play. Cynthea is the most generous person I have ever met in the crafty world and her encouragement along with Lori's keeps me going. I will miss it so. With that said, here are my cards for the mix it up challenge! 

Santa down the Chimney
I had such a great time grabbing my supplies from all over the place! I was really in love with this red, green and black palate and so I went diving into my extensive doodlebug stash to find my supplies. :) 

A Forth of July line, a Halloween line, and some staples? yes please. This santa going down the chimney from the Milk and Cookies odds and ends had me at hello. I added some liquid adhesive and tinsel glitter and gave Mr. Claus some pizzaz! 


kraft in color: beetle black stripe/houndstooth (4178)
booville 6x6 paper pad (5805) (green polka dot paper and black and white stripe paper)
yankee doodle: festive flowers (5619)
milk and cookies: odds and ends (5766)
milk and cookies: this and that (5776)
mini doily in beetle black


Merry Christmas
This card was so much fun to put together. Again I wanted to showcase this stocking odds and ends. I added some tinsel glitter to the top mantle and the tops of the stockings. The Merry Christmas sentiment is a sticker that comes pre-made from doodlebug and the little dog came from the mini icons in the milk and cookies collection. The velvet black cardstock gives it a lovely depth. 

I had my 5 year old encouraging me when I thought of the idea to cut the gingerbread and candy cane sprinkles and "stuff" them down the stockings. I cut the bottoms off at an angle to make it look like they were going down. It was so hard to do. I kept hearing that gingerbread man from Shrek™ say, "not my buttons! Not my gumdrop buttons!!!" brutal. But alas, it looks darling. tee hee.  

kraft in color: ladybug/chevron (4161)
kraft in color: beetle black stripe/houndstooth (4178)
yankee doodle: festive flowers (5619)
milk and cookies: odds and ends (5766)
crushed velvet cardstock: beetle black (1898)
yankee doodle: patriotic paisley (5620)
milk and cookies: mini icons (5768)
shape sprinkles: sugarplums (5754)
doodles: merry christmas - beetle black (3157)
mini clothespins: black and white (4448)
doodle twine: beetle black (2994)


Christmas Cake
Last but not least I felt like I was missing some green in my life so I grabbed this 6x6 paper pad from Booville and this fabulous green on green tone paper stood out to me. Isn't it vivid!?! And of course this Christmas cake doodlepop looked good enough to eat.  

Look at the depth of that doodle pop? I layered it onto two pieces from the This and That sheet and tied a twine bow around the base. I also added the candy cane stripe arrows to the four corners of the green panel and pulled all three cards together using the black on black houndstooth patterned paper from the kraft in color line (the BEST staples).

yankee doodle: festive flowers (5619)
kraft in color: beetle black stripe/houndstooth (4178)
booville 6x6 paper pad (5805)
doodle pops: Christmas cake (5759)
milk and cookies: this and that (5776)
doodle twine: beetle black (2994)
doodles: cardstock stickers: merry Christmas (3155)

And that is all I have for you today! I wish you a VERY merry Christmas and I will miss you all dearly! Luckily you have the BEST design team sticking around to inspire you (and myself). Did you mix and match any doodlebug lines to make Christmas cards this year? We would LOVE to see them! Please share them on any of our social media sites! 

Thursday, December 7, 2017

Neighbor Gifts

Happy holidays everyone!!!! I am SOOO excited to have just moved into a neighborhood where people are focused on community!!! I cannot wait to give out these neighbor gifts! Courtney Lee from Court's Crafts here to share a little neighbor gift inspiration with you for both adults and kids!


The girls had this cute idea to give gold sparkle nail polish. I loved it. To Pinterest I went and found this pin that used the mistle "toes" pun. I am one for puns so I thought this was really fun!

I had my Cricut do the write and cut feature which made this project very fast and fun. 

I tied them on using bubblegum doodletwine

While I was on Pinterest I found this hilarious phrasing about red and white wine and just had to use it. So I grabbed a bunch of bottles of champagne ('tis the season!) and made these cute tags!

I had my Cricut Maker do the writing for me (I am not blessed with that adorable cute writing most of the DT has! lol!) and wrote it on vellum so that the cutest Doodlebug paper would be the focal point. All of this paper is from the Milk and Cookies collection.

I adhered my vellum and while most of it stayed hidden on some of the tags, the adhesive was showing. No one wants that. So I used liquid glue on the edges and added tinsel glitter for some snowy fun. 

Then I decorated my trees with sparkle sprinkles and shape sprinkles and just had so much fun with it! Lastly I tied them to my bottle using some awesome doodlebug chunky twine

Now, just write your name and holiday wishes on the back and leave them on someone's doorstep! I am so excited to have something both for adults and for little ladies!

Did you make neighbor gifts with Doodlebug? We would LOVE to see them!

Tuesday, November 28, 2017

If you give a Mouse a Cookie Birthday Party

My youngest (Lilibeth) is turning 2 the day after Christmas. And as I wasn't done (and wont be for years) with doodlebug's milk and cookies collection I thought it would be fun to turn it into a book theme for our little bookworm!

I chose the books, "If You Give A Mouse A Cookie" and "If You Give A Cat A Cupcake" as the theme books for the party. 

First of all one needs an invitation. I have found that invitations with a lot of parts can be frustrating to put together. So instead of doing that this time I used my print and cut feature and doodlebug cut files to create this invitation. I embellished it with paper from the milk and cookies line as well as glitter sprinkles to give it some pop and liveliness! The details will go on the reverse side, but this is a quick way to make a lot of invitations as well as to embellish them for character.

Next I made this cute t-shirt that says, "Our little cookie is turning two". This is gold glitter iron on material and printable iron on for light fabrics. I printed and cut out the cookies and left spaces for the text in order to get this look. It is sooo much cuter in person!

None of my kid's birthday parties would be complete without a banner! I once again used the book and added some of the Odds and Ends from the Milk and Cookies line. The papers are swiss dots, milk and cookies, booville, petite prints, and some sugar coated cardstock. It was really fun to look through my whole collection and just grab papers that were perfect from all different lines!


Here are a few more close ups of the parts of the banner. These pieces are about 6" high so they are a really good size. I used the doodlebug cut files for milk and cookies as well as one from flea market (the mouse).

For small details of the party I added these cute odds and ends from the milk and cookies line. PERFECT for extra party decor!

Treat boxes are clearly necessary for any party table. I cut these popcorn boxes and then simply used foam dimensional squares to stick the odds and ends onto the front of the boxes. Easy peasy and as my daughter LOOOOOOOVES popcorn I knew I had to get it incorporated into her party.

This is going to be such a fun set up when it is all said and done and this will definitely jump start my progress for her party! I hope you have been enjoying our party feature and that you had a wonderful Thanksgiving!

Saturday, November 11, 2017

Grateful and Thankful

I am so excited about this assignment from Doodlebug. It is such a great thing to take time to stop and remember things you are grateful for. Courtney Lee from Court's Crafts here and we just moved quite a ways from "home" and are in a new neighborhood. There have been a couple of people who have been just SOOO kind and I was excited to make cards to let them know how thankful we were for their kindness.
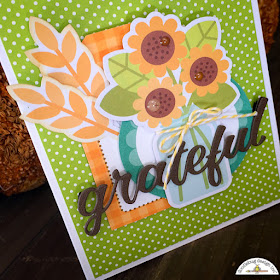
First up is my grateful card. This card took on several iterations with lots and lots of pieces of things strewn around my craft desk until I decided on this design. I wanted to showcase the sunflowers in a jar and the wheat. 

The sunflowers and the wheat came from the Odds and Ends in the Flea Market line. The background is from the Labels and Tags in the Flea Market line. If you haven't checked out Flea Market - you MUST. It is easily one of my favorite doodlebug lines ever (and that is saying something!)

I tied some doodle twine in bumblebee around the jar and popped out my sentiment. The background patterned paper is the amazing swiss dots. Did you know that doodlebug makes a complete swiss dots line that coordinates with all of their colors? And the backside is white with that color swiss dots (as shown in the next card) if you are looking for something a little more understated. 

For this next card I wanted to make a wreath out of fall things. I started with the sunflower odds and ends and worked my way up. This is the "b" side of one of the swiss dots papers. It's just the right kind of "white" with a touch of color. 

I added some of the icons and an older generation leaves shape sprinkles. I love how they add a pop of shine.

Lastly I added the acorn cute clip from the Flea Market collection and popped my sentiment above it all. These pictures don't do the dimension on this project justice. It's really lovely as I popped some once or twice or not at all and it gave it some beautiful dimension.

Here they are! I hope this inspires you to pull out your Flea Market collection that you have hiding around and make some cards for anyone who has done something nice for you - or keep them in your purse for a waitress or waiter that went above and beyond their job! You never know when your thanks is exactly what someone needed at that time - a little appreciation. Spread joy through the season!

Sunday, October 29, 2017

Washi Tape Challenge!

Hello everyone! I hope you have been enjoying all the awesome washi tape projects that the DT have been doing! Courtney Lee from Court's Crafts here with a few more!

For this first card I wanted to use a bunch of washi tape from the Cream and Sugar collection that I was in LOVE with but didn't get to use on my original projects with this collection. So I grabbed it and had this idea of making "confetti" out of it. 

The chevron was half size washi tape so it took two of those side by side to make it the same size as the others. 

I just cut white squares out and covered them with the washi and then popped them as desired with dimensional tape. 

I added some heart shape sprinkles, sequins, and stickers and voila! Ready to send to someone I love!

I bought these cute cases for the girls so they would (ahem) stop fighting over craft supplies. Best $2.99 I have spent yet!

I grabbed Emmaline's and added her name using the new Abigail font on this awesomely bright rainbow washi tape. Isn't the Abigail font perfect!? It might be my most favorite font ever. 


How cute is that?!

My last card was actually my first idea. I wanted to make a "present" out of the washi tape.

I was originally intending it to be clean and simple and then kept adding and adding and LOVED it. I had it on an embossed white background with this awesome glitter paper as a border but just had to have more sparkle! 

I added this cute gingerbread man and the word, "Sweet" from the Milk and Cookies Odds and Ends. This is one of those cards that looks so much cuter in person. I cannot wait to send it out!

I hope you enjoyed my projects! How do you love to use your washi tape?! Please share with us on the doodlebug facebook page

Tuesday, October 17, 2017

Milk and Cookies

Okay, so this is one of those collections that you HAVE to have in your hot little hands to fully appreciate. It goes together SO easily and I just LOVE IT. It's Courtney Lee from Court's Crafts here with a card trio that makes me so happy. 

Traditions!
 This card was so much fun to make for me. It was one of those that had some inspiration behind it and then I just started cutting away and adding bits here and there. I really wanted to showcase some of the adorable patterned papers. 

I grabbed this fabulous Traditions sticker off of the This and That sticker sheet as well as the arrows that I used as corner pieces. If you know me then you know how I feel about shaped sprinkles and how I cannot get enough of them. I HAD to get that adorable gingerbread man on there and the cookies and hearts - how cute are those!?   

 I tied the doodle twine around the top and then glued the whole thing down. I actually pulled the whole thing up to add the doily. It was an afterthought that became the element that brought together the next two cards!

doodles used:

Santa's Hungry
This is a mini card that comes in the create a card Christmas assortment. I put another doily down and then the red and white border came from an odds and ends acrylic piece!

How cute is that doodle-pop? Santa visit was just too cute to leave in his packaging. I looked over and saw on the front of the 6x6 paper pad that they had santa in his chair with a glass of milk and a cookie in his hand so I just grabbed them off of the shape sprinkles package and added them. Done! Voila!

Look at the depth of those doodle-pops! They are so 3-D in real life! 

doodles used:
create a card christmas assortment (5738)
doodle pop: santa visit (5760)
odds and ends: milk and cookies (5766)
shape sprinkles: milk and cookies (5753)
mini doilie in lily white (4605)

Mrs. Claus is Baking
I mean, isn't she darling!? Again, these patterned papers were just too cute not to showcase. I picked three that were darling together and then added the red and white striped "belt".

This milk jug is just sooo 80's but 80's darling and I love whisks... like I have 4 and have to restrain myself from buying new ones so I just had to get it in here along with a couple more cookies. 

I added a spoon to Mrs. Claus and some shape sprinkle hearts to the sentiment piece which came off of the this and that sticker sheet. I tucked two halves of a doily behind the sentiment to finish it off.

doodles used:
6x6 paper pad: milk and cookies (5806)
this and that (5776)
shape sprinkles: sugarplums (5754)
icons (5774)
mini doilie in lily white (4605)


I hope this inspires you to start your Christmas card and that you will run right out to grab some of this fabulous and fun Milk and Cookies collection before it is gone!