It's the My Pink Designer showcase today over at
My Pink Stamper's blog! Head on over there to see what we created! The challenge was a "different fold" card. So I combined a gate card and an easel card to do both. I wanted it to look like windows so I used my
Gypsy (I LOVE MY GYPSY) to put window into the card. Here is the picture tutorial on how I did it:
FYI if you don't have a Gypsy, you can use
Cricut Craft Room! Check it out and it's FREE!!!
My card base was 8.5x8.5" before I cut it, so I did calculations on where I would need the window to go. Then I hid the outside of the window that I took from Kate's ABC's so that only the boxes cut out and not the whole window which would have defeated the purpose.
I taped the yellow polka dots to the white card stock base where I wanted them. Then I put the blade on 6, speed on high, and multi-cut on 2 to ensure that it got through both pieces of card stock.
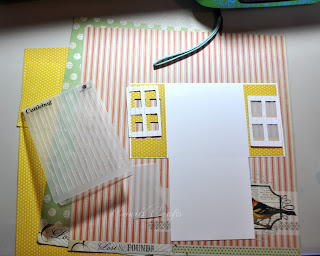
This is the windows so that there are frames around the windows. I cut them out of white and embossed them with the Cuttlebug Distressed Stripes Emboss Folder.
This is what it looked like when I finished cutting it. I actually used the scraps of the 8.5x11" paper to create these. I love using my scraps!
I cut of the bottom 2 1/8" x 4/25" from each side.
Next I embossed the window frames with the Cuttlebug Distressed Stripes Emboss Folder. I cut velum to the appropriate size and used a liquid glue to put it behind the window frames, but in front of the yellow polka dotted paper. Here you can also see the three patterned papers I had picked out for my inspiration for the project. :)
I scored the lines appropriately (I can give you these measurements later if anyone wants them).
I took one of the window pane cut outs (which was a double layer of card stock and therefore pretty sturdy) and put it on the back being careful to only put adhesive on the top half.
I put a piece of card stock to fit the inside and stamped the sentiment so I could use it for a birthday card.
Side view of the easel and the gate portion when open.
Front portion after it has been decorated!
Recipe:
Don't forget to hop on over to
My Pink Stamper's blog to see what the other ladies have done with this challenge! :)


